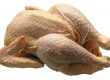
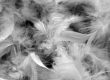
The process of butchering a chicken is often performed immediately after feathers are picked. Some people, however, prefer to cool the chicken before butchering. Either way, the process is the same.
There are some basic tools you will want to collect before beginning the butchering process including:
- Sharp kitchen sheers
- Sharp knife
Butchering is a 10-step process that completes the meat bird process. The steps include:
- Remove the feet
- Remove the oil gland
- Remove the head, neck, crop and windpipe
- Separate the vent from the body
- Remove the internal organs and separate the giblets
- Rinse the chicken thoroughly
- Cool the chicken
- Age the meat
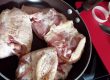
- Cut chicken into pieces
- Pack and store your meat
Remove the feet
Some Asian cultures eat chicken feet. In fact, I had the opportunity to try this delicacy while visiting China. If it is your desire to save the feet, go for it. Personally, even after having the opportunity to try the dish, I prefer to focus on eating the more traditional parts of the bird.
The process of removing chicken feet during butchering is the same regardless of their intended use. To remove the feet:
- Hold the foot in one hand
- Use a sharp knife to cut through the leg just below the bottom (hock) joint
- Optionally, you may use kitchen sheers instead of the knife to make the cut
Remove the oil gland
The oil gland is located on the tail and it contains foul-tasking oil that you do not want to mix with the meat you plan to eat. The oil form this gland is used by chickens to lubricate their feathers. It’s not a deal breaker if this oil touches the meat, but take our word for it… it’s much better to remove this oil before you get any farther into the butchering process.
To remove the oil gland:
- Lay the chicken on your working surface so the tail is located on the top side
- Locate the nipple of the oil gland on the tail
- Use a sharp knife to make a deep cut (down to the tail bone) one inch above the nipple
- Continue your cut down and around each side of the gland
- Ensure your cut “scoops” completely under the gland to ensure it releases from the body easily
- Remove the gland
Remove the head, neck, crop and windpipe
If you used an axe to kill your chicken, then the head is already removed. If not, you can use a sharp knife or kitchen sheers to remove the head above the top neck vertebrae. One downside to cutting of the head is that you may create bone fragments. If you want to use the time-tested method that leaves no bone fragments, just pull off the head using your hand. It should separate at the top of the neck. It’s not an approach that comes naturally, but it certainly works very well.
While you will not have much use for the crop or windpipe, you will probably want to save the neck. Neck meat is great for making stock, adding to stuffing, enhancing soup and much more.
To remove the neck:
- Insert a sharp knife between the shoulders at the base of the neck
- Cut a slit in the skin the entire length of the neck along the back side
- Pull the skin away from the neck
- Make another cut below the crop to release the crop and windpipe
- If you did not take your chicken off feed for at least 12 hours be extra careful not to spill crop contents
- Use kitchen sheers to cut the neck off at the base, close to the shoulders
- Discard crop and windpipe
- Save the neck
- Optionally, use kitchen sheers to cut the extra flap of skin off (leave it if you plan to roast the chicken)
Separate the vent from the body
As you know by now, the “vent” is the opening on the chicken than brings both fresh eggs as well as fresh fertilizer into the world. Because it is attached to the chicken’s intestines, which contain excrement, you need to be careful and prevent the contents of the intestines from contaminating the meat you plan to eat while butchering the bird.
Your goal is to separate the vent from the rest of the chicken’s body without puncturing the intestines, which attach to the back of the vent. This process includes the following steps:
- Lay the chicken on its back, breast side up, on a flat working surface
- Insert a sharp knife into the chicken between the vent and the tail (do not push the knife in too far)
- Move the knife making a circular incision 25% of the way around the vent on the right side
- Return the knife to initial cut location
- Move the knife making a circular incision 25% of the way around the vent on the left side
- Insert your fingers (from one hand) into the half circle cut
- Grab hold of the vent/intestine from inside the chicken
- Do not release hold of the vent
- Use kitchen sheers in your other hand to cut the second half of the circle (100% around the vent)
- Continue to hold the vent (now separated from the body) in you hand
- If plan is to roast: Use sharp knife to make a 3” horizontal cut through the skin 2” above the vent
- Alternatively, if plan is to quarter: Make a vertical cut from keel (center chest) down to vent opening
- Continue to hold the vent in your hand and move immediately on to next step
As mentioned above, the process varies slightly depending on the way you intend to dress the chicken. We recommend a vertical cut through the chest skin (from keel to vent) when quartering, and we recommend a 3” horizontal cut when roasting. The reason you make a horizontal cut through the skin when planning to roast is that it gives you a place to tuck the end of the leg bones. When done properly, this flap of skin is a natural replacement for plastic restraints used in commercial chickens and turkeys.
Remove the internal organs and separate the giblets
Just like cleaning a fish you just caught while camping with the family, before cooking a chicken, you will need to clean out the “guts” otherwise known as internal organs or viscera. Once everything is removed from the body cavity, you have the option of preserving the edible components, called giblets, that include the heart, liver and gizzard.
To remove the internal organs:
- Hopefully, you are still holding on to the vent in one hand
- Insert your other hand into the 3” horizontal cut (if planning to roast) or into the long vertical cut (if planning to quarter) you made in the previous step
- Scoop your hand around all sides of the body cavity to break the membranes
- Your goal is to separate the innards from the chicken
- Locate the gizzard based on feel (it will be harder than other organs)
- Grab the gizzard and as much of the rest of the organs that you can
- Pull slowly, ideally removing al organs at once
- After initial bunch is removed, check to ensure nothing has been missed
- Ensure both lungs are removed
- For male meat birds, ensure you remove both testicles located along the backbone
- For female meat birds, ensure you remove the sack of undeveloped eggs located along the backbone
Now that the organs are removed, locate the heart, liver and gizzard. If you plan to keep the giblets, follow these steps:
- Locate the liver and cut it away from the rest of the innards
- Look closely within folds of liver to locate the gallbladder (small green sack)
- Cut out the gallbladder without spilling the green bile
- If you make a mistake, and bile spills onto the liver, discard the liver
- Locate the gizzard and cut it away from the rest of the innards
- Make a cut into the larger end of the gizzard until you hit the tough lining
- Continue the cut and use your fingers to remove the lining
- Wash away the gritty contents
- Locate the heart and cut it away from the rest of the innards
Rinse the chicken thoroughly
Maybe this step of butchering is so obvious it should go without stating. Nonetheless, the next step is to thoroughly rinse all parts of the chicken you plan to keep in cold water top ensure they are clean.
At the same time, you should contain and dispose of the parts of the chicken you do not plan to keep. Regulations vary depending on where you live. Some areas require you to bury the remains several feet under ground, and in some areas it’s okay to burn the remains. Check your local ordinances because often you are not supposed to throw the remains in your normal trash.
Cool the chicken
There are two primary ways to cool a freshly butchered chicken. The most common way is in a cold-water bath, and the second approach is to air-cool.
One criticism of some commercial operations is that they use large cold-water baths to cool many birds at once. The problem with this approach in a commercial setting is that fecal matter left behind by mechanical slaughtering machines may contaminate the water. Then, the contaminated water may be absorbed into the chicken skin and meat ultimately ending up at your dinner table.
A second criticism of commercial operations that use cold-water baths is that the chicken meat and skin become heavier as water is absorbed. Since chicken is typically priced per pound, the customer ends up paying not only for the chicken but also for the water absorbed in the cooling bath.
In a home setting, cold-water baths are a perfectly appropriate way to cool down a chicken. The benefit of using the cold-water approach is that you will not need much more than a big vessel (e.g., a basin or large cooler) filled with water and ice. You may need to add additional ice once the warm birds are added, but other than that effort, the process is straightforward. The primary downside to water-cooling is that your chicken will absorb water from the bath, primary in the skin. Once the skin absorbs water, it will be less likely to brown and crisp when baked. If you want to roast your chicken to a golden brown, you may want to consider air-cooling.
To air-cool a chicken, you will need an empty refrigerator. Simply wrap each bird in a cotton cloth is ensure it does not dry out, and place it in the fridge. Ideally, keep chicken on racks in the refrigerator, not on solid shelves. The racks allow much better air circulation. Do not overcrowd the space because maximum airflow will ensure quicker cooling.
In both the cold-water bath approach as well as the air-cooling approach, your objective is to get the chicken below 40° F as quickly as possible, but not below 32° F (freezing). Once the birds reach the desired temperature, you should move on to the next step in the process to age them.